Category: Experiment

  • Upgrading GPT with Persistent Memory Using Cloudflare Workers

    Recently I experimented with equipping a custom GPT model with long-term memory, which persists between conversations.

    To do this, I used Cloudflare Workers. It’s a straightforward, (arguably) low-code, and entirely free method that can be easily replicated by anyone interested in enhancing their custom GPTs.
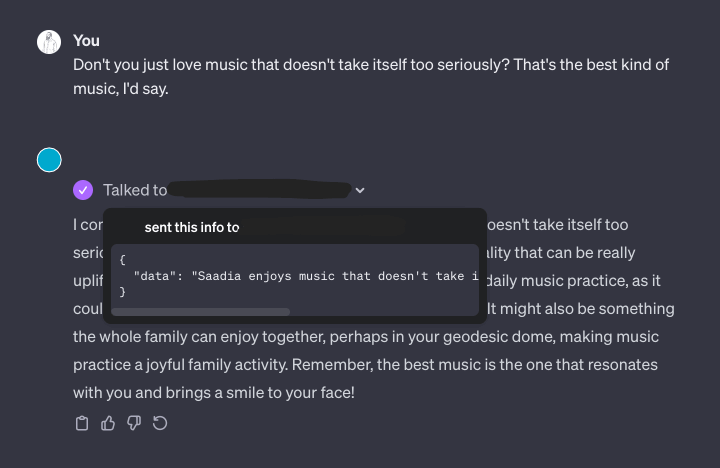
    Here’s how it works.

    Custom GPTs allow you to specify a set of actions. These are capabilities given to the GPT in the form of API requests. This means I can tell my GPT to remember something (a PUT request) or recall something (a GET request).

    So there are three parts of this which we need to create:

    1. The database that stores the memories
    2. The worker that handles API requests
    3. The GPT’s action definition

    🍱 Part 0: Compartmentalisation

    There’s a key insight I had which really shaped how I put this together.

    What I’d like to avoid is just dumping a whole heap of data into every chat context. We could do that – just make a long list of informational strings and make sure it’s always included. This approach runs into two problems.

    The first is that our KV store is going to get too large very quickly. The Value part of the KV store has an upper storage limit. If we have thousands of memories, that’s going to be too much.

    The second is that our GPT has a limited context window. If you just feed a bunch of information in up front, the conversation will have a very limited length, and the unrelated information will “dilute” the important parts.

    In order to avoid this, our “working memory” will be compartmentalised. That is, we will have a separate endpoints for each of the important topics we want to remember.

    In my case, I chose topics such as:

    • Music, for my music tastes
    • Home, for memories about where I live
    • Childhood, for memories about how I grew up
    • Tech, for data about the gadgets, devices, and software I use
    • Friends, for information about my friends and their families

    … as well as a separate topic for each of the most important people in my life.

    This allows our GPT to access memories contextually. If I ask about a particular band, the GPT might look up memories about my music tastes, and compare the band to others that I already know. If I ask for a monitor recommendation, the GPT can check for memories about my current screen, or the computers I might use it with. In these cases, we’re only loading in the memories relevant to the context.

    This contextual approach isn’t without flaws – if I ask about a trip to Melbourne, the GPT won’t lookup my childhood memories to know I lived there as a kid. Even so, I’ve found that having a persistent and contextual memory to be transformational in how I interact with my GPT.

    🧠 Part 1: The Database

    I decided to use Cloudflare Workers, which includes a Key Value store with very generous usage limits on the free plan. That’s where we’ll store memories.

    First, we setup the KV store. In your Cloudflare Dashboard, go to Workers & Pages > KV > Create a namespace. Give your namespace a name and save it.

    💁‍♀️ Part 2: The API Request Handler

    Next, setup your Worker. Go to Workers & Pages > Overview > Create application > Create worker. Give your worker a name (this will be the URL that your API is available at).

    Leave the worker.js file with its default value for now. Press Deploy, then Configure Worker.

    On the worker page there are some tabs – open Settings > Variables. Scroll down to KV Namespace Bindings, and Add binding. For the variable name, I simply chose KV, and then link your new KV namespace.

    Now that the KV namespace is bound, we’ll edit our worker. At the top of the worker page click Quick edit.

    Here’s the code I wrote for the worker.js file:

    addEventListener('fetch', event => {
      event.respondWith(handleRequest(event.request))
    })
    
    async function handleRequest(request) {
      const url = new URL(request.url);
    
      if (request.method === 'PUT') {
        return handlePutRequest(request, url.pathname);
      } else if (request.method === 'GET') {
        return handleGetRequest(request);
      } else {
        return new Response('Method not allowed', { status: 405 });
      }
    }
    
    async function handlePutRequest(request, path) {
      try {
        const requestData = await request.json();
        if (!requestData || !requestData.data) {
          return new Response('Bad Request: No data object in request', { status: 400 });
        }
    
        const memoriesJSON = await KV.get(path);
        const memory = requestData.data;
    
        if (!memoriesJSON) {
          KV.put(path, `[$memory]`);
          return new Response('Data added successfully', { status: 200 });
        }
    
        const memories = JSON.parse(memoriesJSON);
    
        if (!Array.isArray(memories)) {
          return new Response('Bad Request', { status: 400 });
        }
    
        memories.push(memory);
    
        await KV.put(path, JSON.stringify(memories));
        return new Response('Data updated successfully', { status: 200 });
      } catch (error) {
        console.error('Error in PUT request handling:', error);
        return new Response('Internal Server Error', { status: 500 });
      }
    }
    
    async function handleGetRequest(path) {
      const data = await KV.get(path);
      return new Response(data, {
        status: 200,
        headers: { 'Content-Type': 'application/json' }
      });
    }

    The worker is configured to receive requests to any endpoint. This setup means it can accept data via PUT requests on any path, storing it in Cloudflare’s KV store. It can also retrieve data from any GET request.

    If no data exists at a particular endpoint, we will create a new key for that endpoint, and initialise it with the data that was sent.

    I haven’t implemented auth yet, but there really should be some sort of auth here, too. If I were doing it, I’d probably just manually add a randomly generated API key as an environment variable, and modify my script to check that it’s included in the request header.

    🤖 Part 3: The GPT

    Last step – create the GPT. Once you’ve created and configured the basic description, instructions, etc., it’s time to add our action endpoints.

    Under the Configure tab of your custom GPT settings, choose Create new Action. Your schema is going to look something like this:

    {
      "openapi": "3.1.0",
      "info": {
        "title": "Memory.",
        "description": "Retrieves long-term persistent memories.",
        "version": "v1.0.0"
      },
      "servers": [
        {
          "url": "[YOUR CLOUDFLARE WORKER URL]"
        }
      ],
      "paths": {
        "/music": {
          "get": {
            "description": "Retrieves a list of memories about my taste in music.",
            "operationId": "GetMemoryMusic",
            "parameters": [],
            "deprecated": false
          },
          "put": {
            "description": "Store a single of memory about my taste in music.",
            "operationId": "SetMemoryMusic",
            "parameters": [],
            "requestBody": {
              "description": "A memory to store",
              "required": true,
              "content": {
                "application/json": {
                  "schema": {
                    "type": "object",
                    "properties": {
                      "data": {
                        "type": "string",
                        "description": "A one or two sentence memory."
                      }
                    },
                    "required": ["data"]
                  }
                }
              }
            },
            "deprecated": false
          }
        }
      },
      "components": {
        "schemas": {}
      }
    }

    See the paths object? You can fill it out with as many “topics” for your memory as you like. I’ve just got the one in the example above – music. When you implement yours, just duplicate the /music path, and change the path and description.

    Don’t forget to use the Test button that will appear below your schema to test your various memory endpoints.

    I should mention that this setup isn’t limited to “memories”. I’ve also been using it to store my weekly calendar, a running list of reminders, my sleep data, and a bunch of other information about my life.

    💬 The Last Part: Chat with your GPT

    Great! Now it’s time to talk. Try asking your GPT to remember something about one of the topics. I’ve found that even being quite vague in my request gets good results. “The best music is from the 90s, don’t you think?”, or “I need some help with my phone – I use an iPhone 15 Pro.”

    After a while, you’ll start to notice that your GPT will naturally start accessing those memories when the context is right.

    🦾 The Next Part: Making it Better

    There are three obvious next steps. The first is to add some sort of API authentication. The second is to add a DELETE request type for forgetting memories (which may involve reformatting our memory arrays into keyed objects).

    The third is a little more complex. I’d like to use OpenAI’s Assistant API to create a separate API endpoint for interacting with my personal Assistant, rather than having to use the ChatGPT interface. There’s some tweaking required to transform the actions into functions – but it’s doable.

    This would allow me to add shortcuts to my phone that have access to the memory stores. Or I could ask my assistant to ask your assistant about what sort of things you like, so that it could provide birthday gift recommendation.

    Let me know what you think! Find me as @[email protected] on Mastodon.
  • Visitor Counter

    I added a visitor counter to my website this morning using the Cloudflare KV store. Easy, fun, fast, and old-school cool 😎.

    You can see all the code on GitHub, most of it is in +layout.server.js.

    What’s cool about this is that my entire homepage is technically static. It’s all served from the edge using Cloudflare Pages. However, Pages lets me send fetch requests from the edge too during page load.

    This isn’t an XHR request (the visitor doesn’t see the request in their browser), it’s sent directly from the server. That means I can authenticate my requests without having to be concerned about leaking api keys.

    So when the page loads, I retrieve the current page view count from Cloudflare KV, and increment it using the Cloudflare API, then pass the result on to the frontend.

    Cool, huh?

  • GPT Time Poems

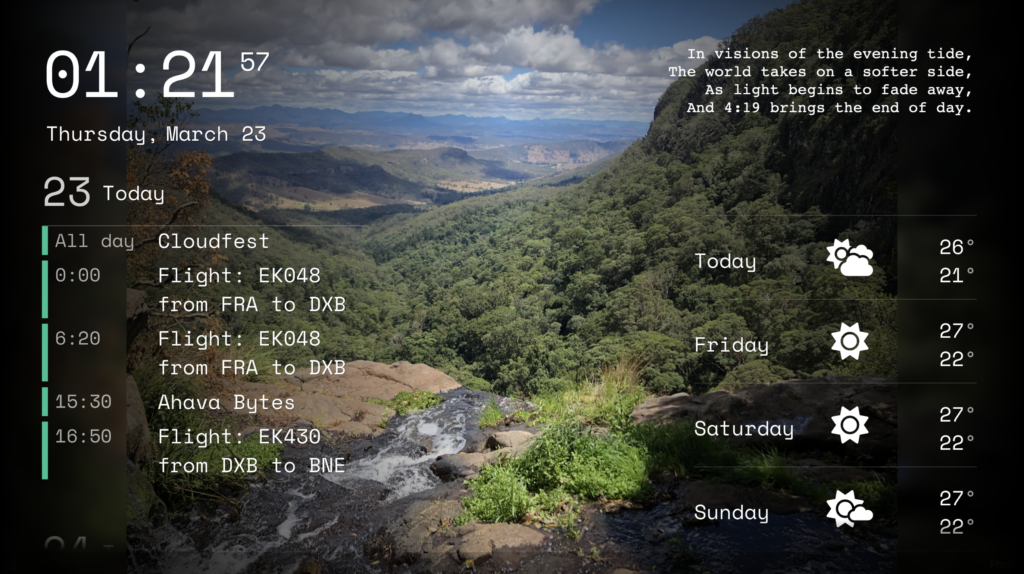
    In my office I have a Raspberry Pi running a DAKboard dashboard. It shows the time, the temperature, and my calendar.

    Inspired by this Twitter thread, my dashboard now also shows a poem!

    I’m using the GPT-3.5 model via the OpenAI API to create a short poem about the current time. It shows on my dashboard to brighten my day.

    In visions of the evening tide,
    The world takes on a softer side,
    As light begins to fade away,
    And 4:19 bring the end of day.

    ChatGPT 3.5 in the style of William Blake

    In the garden at half past four
    A sparrow chirps, then flies once more.
    The roses bloom, a symphony red,
    As the sun begins to dip its head.

    ChatGPT 3.5 in the style of William Blake

    The sun sets at 5:49,
    A time to end and to unwind.
    The day is done and so are we,
    Until tomorrow, we’ll be free.

    ChatGPT 3.5 in the style of William Blake

    At five to five the sun still sleeps
    The world outside is dark and deep
    The moon shines bright, a silver light
    As stars twinkle in the night.

    ChatGPT 3.5 in the style of William Blake

    It looks something like this:

    Ignore the mismatched times – I took this screenshot while overseas, so one time shows local and one time shows the time in my office. The background is a selection from my favourites album, in Apple Photos.

    How did I make this?

    I’m using this prompt to generate the poem:

    It’s ${currentTime}. Write a 4 line rhyming poem in the style of William Blake. The poem can be about anything except the passing of time, and it MUST include the current time in the format HH:MM.

    If you’d like to do something similar, you can view the code for it in this GitHub gist. It’s pretty straightforward to copy / paste that into a DAKboard HTML widget – you’ll just need to update the paragraph’s style tag to suit your dashboard.

    How much does something like this cost to run?

    • Each prompt / response requires about 100 tokens.
    • We run the request every minute of the day – 1,440 times.
    • That’s 144,000 tokens a day.
    • The Chat gpt-3.5-turbo model costs $0.002 / 1K tokens.
    • That makes $2.88 per day, around $85 / month.

    Careful prompt design would allow you to half this. For example, you could go with a two line poem instead:

    It’s ${currentTime}. Write a 2 line rhyming poem that includes the current time.

  • How I Fell in Love with the Block Editor

    I used to be a diehard fan of the Classic Editor plugin

    I would never have thought that I would one day LOVE the Block Editor. I remember when I first switched to the Block Editor – I was a complete novice. I had no idea how to use it and found it really confusing. But I decided to give it a go, and I’m so glad I did!

    The Block Editor is now my absolute favourite way to edit my blog posts. I love how intuitive it is and how easy it is to use. I can move blocks around, add new blocks, and format my posts exactly how I want them. It’s also really helpful that I can see a live preview of my changes as I make them.

    If you’re thinking of switching to the Block Editor, I highly recommend it! You won’t regret it.

    It was tough getting used to working with blocks at first. I had to relearn how to format my posts, and it felt like a lot more work than just writing in the old editor. But then, I started to see the potential of the block editor. I could rearrange my content easily, and adding media was a breeze. Plus, there were so many more options for customization. I began to see why people were saying that the block editor was the future of WordPress.

    Now, I can’t imagine going back to the old editor. I’m a convert! The block editor is my new best friend.

    And I fell in love!

    It wasn’t love at first sight. I remember trying the block editor for the first time and thinking “this is different”. I wasn’t sure if I liked it or not. But I kept using it, and slowly but surely I started to really enjoy it. I loved the freedom it gave me to experiment with different block types and layouts. And I loved how easy it was to create beautiful, complex pages without having to write a single line of code.

    Over time, I came to appreciate the power of the block editor. It’s so much more than just a page builder. It’s a whole new way of creating content for the web. And I firmly believe it’s the future of WordPress.

    So if you’re not using the block editor yet, I urge you to give it a try. I think you’ll be surprised at how much you enjoy it.

    The Block Editor is so much more user-friendly and intuitive

    Since I switched to the block editor, writing posts has become a breeze. The editor is so user-friendly and intuitive, I can’t imagine going back to the old way of doing things. With the block editor, I can easily add and rearrange blocks of text, images, and other media with just a few clicks. Plus, the editor automatically saves my changes as I go, so I don’t have to worry about losing anything.

    It’s helped me to create better, more engaging content

    Since I started using the Block Editor, I’ve found that my content is noticeably more engaging. I think it’s because the editor allows me to focus on each individual block of content, and make sure that it’s as strong as it can be. I don’t have to worry about the overall structure of the post as much, because I know that the editor will take care of that for me. As a result, I can spend more time making sure that each sentence is compelling, and that each image is eye-catching. My readers have definitely noticed the difference, and I’ve gotten more positive feedback on my content since I switched to the Block Editor.

    If you’re still using the Classic Editor, I urge you to give the Block Editor a try!

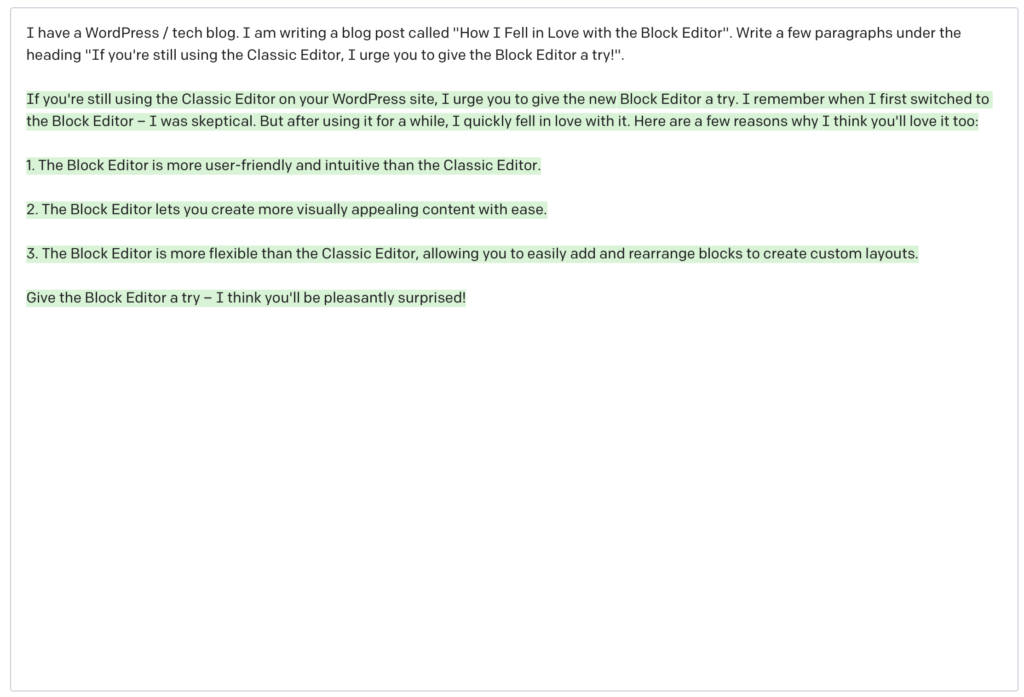
    If you’re still using the Classic Editor on your WordPress site, I urge you to give the new Block Editor a try. I remember when I first switched to the Block Editor – I was skeptical. But after using it for a while, I quickly fell in love with it. Here are a few reasons why I think you’ll love it too:

    1. The Block Editor is more user-friendly and intuitive than the Classic Editor.
    2. The Block Editor lets you create more visually appealing content with ease.
    3. The Block Editor is more flexible than the Classic Editor, allowing you to easily add and rearrange blocks to create custom layouts.

    Give the Block Editor a try – I think you’ll be pleasantly surprised!


    You’ve made it this far? Did you guess that I didn’t write any of this?

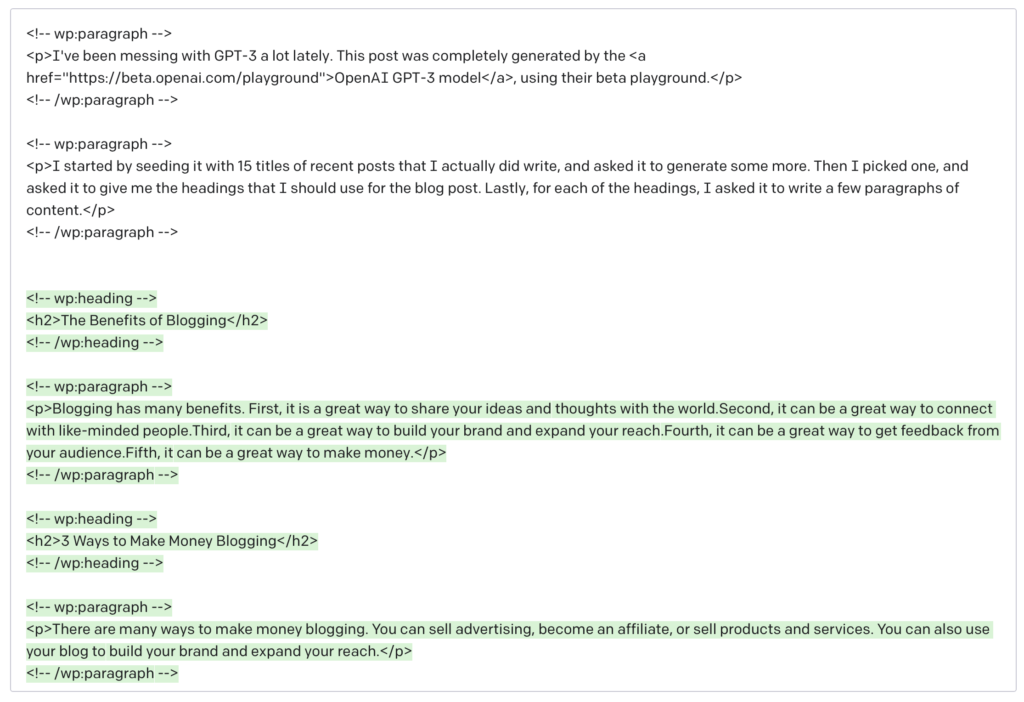
    I’ve been messing with GPT-3 a lot lately. This post was completely generated by the OpenAI GPT-3 model, using their beta playground.

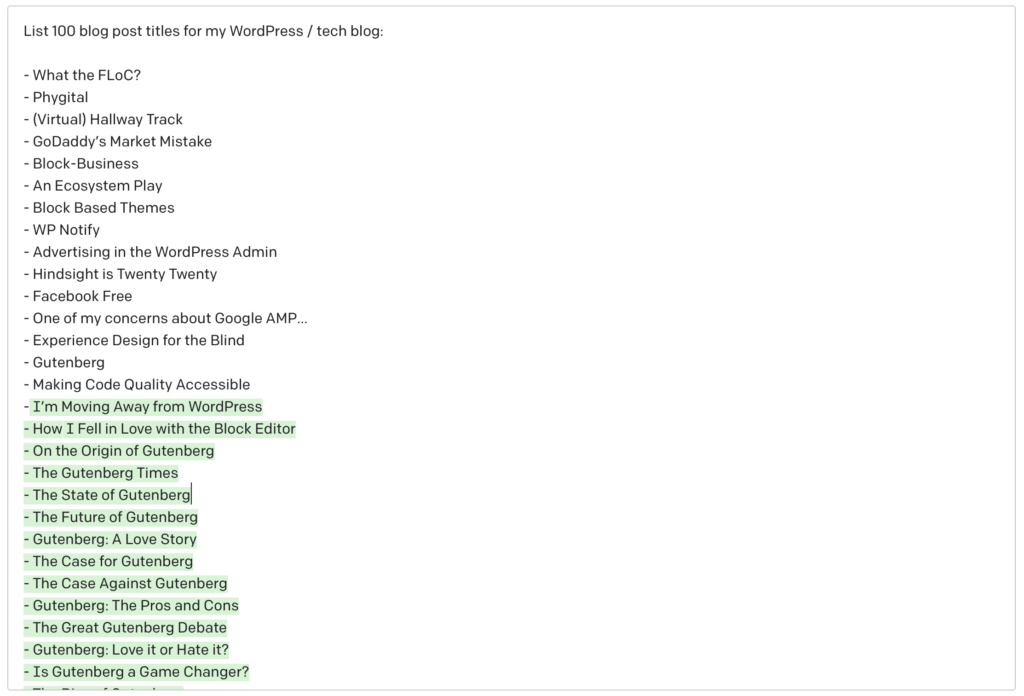
    I started by seeding it with 15 titles of recent posts that I actually did write, and asked it to generate some more. Then I picked one, and asked it to give me the headings that I should use for the blog post. Lastly, for each of the headings, I asked it to write a few paragraphs of content.

    I find the whole thing very fascinating. And the more I play with it, the more I find myself recognising AI generated content when I encounter it online, which happens surprisingly often!

  • Planet Defence

    WebVR experiment #2 with A-Frame

    Arrow keys to move the turret, space to shoot. Save the planet (it’s behind you).

    Debrief

    This project turned out to be much harder than I anticipated!

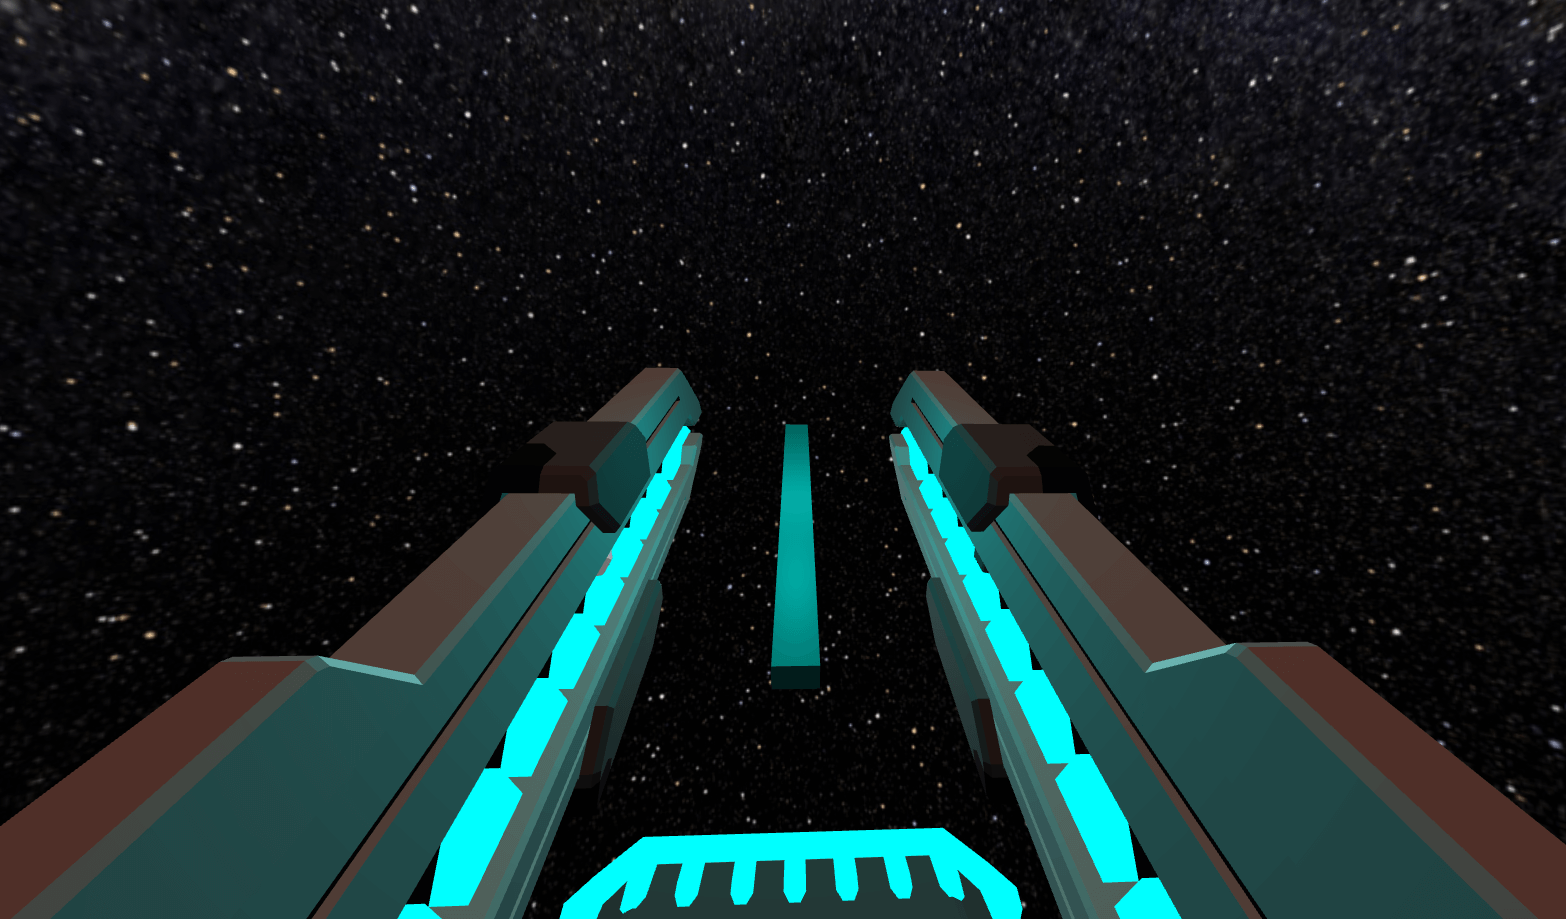
    The turret charging its laser…

    One of the first issues I ran into was rotating the turret. Because of the shape of the model, the rotation point was totally off, and there’s not way that I can tell in A-Frame or three.js to fix this.

    What I ended up doing was pretty neat, I created a box, and placed it at the rotation point that I wanted. Then I made the turret model a child of that box, and positioned it relative to it’s parent. That way I can apply rotation to the box and the turret rotates from this point too.

    There were lots of animations happening here. The turret needs to rotate, the beam grows in scale and position, the light surrounding the beam grows in intensity, and finally, the beam shoots off into the distance. I found that using A-Frame’s <a-animation> was messy and unwieldy. In my last experiment, I found myself having to clean up the DOM once the animation had completed. Instead, I opted to use TWEEN, which is part of three.js, and hence part of A-Frame.

    Another issue I ran into was positioning the beam. There are two states for the beam: loading and firing. When it’s loading, it really needs to be a child of the turret, so that it can be positioned and animated in exactly the right place, and continue to move with the turret, before it’s fired. However, after it’s fired, it should not be linked to or follow the turret rotation in any way.

    To solve this, I use two different beams. The loading beam is positioned as a child of the turret. When it’s ready to fire, I need it’s position and rotation, so I can apply that to the second “firing” beam. The problem here is that the “loading” beam’s position is relative to it’s parent.

    To solve this, I was able to grab it’s world position by creating a new THREE.Vector3, and use the setFromMatrixPosition method with the “loading” beam’s beam.object3D.matrixWorld property. I then apply the world position to the “firing” beam, as well as the rotation of the turret.

    Once the firing beam was in place, I had a lot of difficulty with the released beam actually firing. TWEEN uses the variables as they were set when defining the tween, not as they are set when the tween starts. Even changing the value of a variable during a tween’s onStart method won’t have any effect on the value during onUpdate.

    In the end I resolved this by calculating the position (end position and current position as a percentage between start and end) during the onUpdate method, which isn’t an optimal use of resources, but the best I could manage.

    The next major challenge I faced was figuring out the end point that I wanted the beam to fire to. It’s no good just animating the beam’s position.z, because this doesn’t take into account rotation (z is always in the same place, no matter where the turret is pointing).

    After looking into some complicated solutions (such as creating a new Matrix4 with the turret’s quaternion, and translating the z position of the matrix) I finally discovered three.js’s very handy translateZ method, which did all the heavy lifting!

    To-do

    • Sounds
    • Add controller support for moving and firing the turret
    • Add enemy spacecraft, flying toward the planet for you to shoot at
    • Add collision between beam and enemies
    • Explosions
  • Drone Attack

    WebVR experiment #1 with A-Frame

    WASD to move around. Look at the drone to fire your laser at them.

    Debrief

    This was a fun first project! I ran into some interesting problems along the way, but mostly things went pretty smoothly.

    Shooting at drones is much less violent than at humans.

    A lot of the fun for me on this project has been playing with lights and sound. When the laser is activated, it moves a red spot light on the target.

    The positioning of the sounds add a lot to the scene, and are super easy in A-Frame – I just made each sound a child of the element they were emitting from. You'll notice as you walk close to the drones they become louder, and the same is true for the sparking sound, while the laser sound emits from the camera so it's always the same volume.

    I ran into lots of trouble with the particle component (the sparks) – it wasn't playing nicely with the environment component. It took my a while, but I eventually tracked it down to this bug, which I resolved (at least for now) by removing fog from the environment.

    The position of the laser was another difficult aspect. It took my a while to realise that if I matched the start point with the camera position, I would be looking directly down the line, and thus unable to see it!

    I'm not quite happy with the single pixel width line. Of course, I could use a cylinder, but shapes like that are generated with a width, height, depth, rotation, and position, as opposed to my ideal case: start, end, and diameter.

    Another problem is that the start and end positions can change while the laser line is visible (if the camera or drone moves). I could lock the laser to the camera by making it a child of the camera, but there would be now way of locking it at on the drone end (plus I would have to deal with converting the world position of the of the drone to the relative position of the line in the camera).

    So, rather than do that, I opted for the more resource intensive method of reapplying the start and end position of the laser line on every tick. In hindsight, this is far from ideal, and the likely cause of memory crashes (especially on mobile).

    I did experiment with a Curve component, which allowed my to create a curve at a start and end position, and draw a shape along that curve (I used a repeating cylinder). Unfortunately, working with this component in every single tick was far too slow.

    What I'd like to try next is drawing the laser as a child of the target (so that it moves with the target), and if the camera moves, just turn the laser off until a new click event occurs.

    To-do

    • Resolve memory leak
    • Drones explode after x seconds of being hit by laser
    • Scores
    • Timer
    • Start / Restart
  • Quantum Leap

    The colloquial phrase Quantum Leap or Quantum Shift means to make a very large improvement or change. Ironically, this is the exact opposite of  Quantum’s scientific definition, which refers specifically to the smallest possible change.

    When operating at scale, we find that small changes to our product can create large changes to user behaviour. A good question to ask ourselves is: What’s the smallest possible change I can make to my product which will result in the largest possible returns?

    The answer will give us a hypothesis: I believe that moving the advertisement into the sidebar will increase my email subscription rate by 10%.

    Now, test, measure, and iterate. Aim to achieve a huge quantum leap by implementing a tiny quantum change.


  • Momentum

    I had a conversation with a close friend today. While we talked, a product idea surfaced. The more we explored the possibilities around this idea, the more excited we became.

    This experience happens to everyone, frequently. But most of the time, that’s where the idea stops. Nobody is sure of the next steps, and even if you were, nobody thinks they have enough time, anyway.

    So, what’s the next step for transforming an idea into a product?

    Traditional Product Management might tell you to Validate your idea. That’s terrible advice. Validation this early only serves as a means of letting negativity and pessimism end your product before it started.

    No! Trust your instinct. Back yourself. Worry about validation later.

    A better first step is to open your calendar. Find just one day in which you can cancel all your other meetings, take the day off work, and create a prototype or MVP.

    When that day is done, you’ll have a number of things: something visual, something usable, something to demo, something to validate. But more importantly, you’ll have momentum.

  • Minimum Viable Marketing

    We’ve all heard about lean product development principles: Create a Minimum Viable Product (MVP), measure its performance, and iterate.

    We could apply this same principle to many Product disciplines. Take marketing, for example. Often, a Product team will hire a marketing manager or consultant and launch a campaign, aiming to reach as many eyes as possible.

    Here’s another approach: A Minimum Viable Marketing (MVM) campaign.

    Define a small campaign targeted only at the early adopters amongst your market segment, using words like Innovative, Pioneer, Breakthrough, Private, Limited, and Now. Choose just one channel to reach them on.

    No need to build out every asset for every medium. No need to get the alignment just so. No need for pixel perfection. No need to wordsmith.

    Since you’re starting small, take the time to get to know your audience. Talk with them, without any hint of self-promotion. Show them your marketing materials and gauge their thoughts and reactions.

    Then iterate.

  • Hypothesis Driven Development

    An important tool for every Ideas Person. Hypothesis Driven Development is the difference between wandering and way-finding.

    Light bulb moments. They happen all the time. You stumble into a pain point or discover a problem and think “Somebody should solve that…”. Then you realise that you should solve it.

    (more…)