Recently I experimented with equipping a custom GPT model with long-term memory, which persists between conversations.
To do this, I used Cloudflare Workers. It’s a straightforward, (arguably) low-code, and entirely free method that can be easily replicated by anyone interested in enhancing their custom GPTs.
Here’s how it works.
Custom GPTs allow you to specify a set of actions. These are capabilities given to the GPT in the form of API requests. This means I can tell my GPT to remember something (a PUT request) or recall something (a GET request).
So there are three parts of this which we need to create:
- The database that stores the memories
- The worker that handles API requests
- The GPT’s action definition
🍱 Part 0: Compartmentalisation
There’s a key insight I had which really shaped how I put this together.
What I’d like to avoid is just dumping a whole heap of data into every chat context. We could do that – just make a long list of informational strings and make sure it’s always included. This approach runs into two problems.
The first is that our KV store is going to get too large very quickly. The Value part of the KV store has an upper storage limit. If we have thousands of memories, that’s going to be too much.
The second is that our GPT has a limited context window. If you just feed a bunch of information in up front, the conversation will have a very limited length, and the unrelated information will “dilute” the important parts.
In order to avoid this, our “working memory” will be compartmentalised. That is, we will have a separate endpoints for each of the important topics we want to remember.
In my case, I chose topics such as:
- Music, for my music tastes
- Home, for memories about where I live
- Childhood, for memories about how I grew up
- Tech, for data about the gadgets, devices, and software I use
- Friends, for information about my friends and their families
… as well as a separate topic for each of the most important people in my life.
This allows our GPT to access memories contextually. If I ask about a particular band, the GPT might look up memories about my music tastes, and compare the band to others that I already know. If I ask for a monitor recommendation, the GPT can check for memories about my current screen, or the computers I might use it with. In these cases, we’re only loading in the memories relevant to the context.
This contextual approach isn’t without flaws – if I ask about a trip to Melbourne, the GPT won’t lookup my childhood memories to know I lived there as a kid. Even so, I’ve found that having a persistent and contextual memory to be transformational in how I interact with my GPT.
🧠 Part 1: The Database
I decided to use Cloudflare Workers, which includes a Key Value store with very generous usage limits on the free plan. That’s where we’ll store memories.
First, we setup the KV store. In your Cloudflare Dashboard, go to Workers & Pages > KV > Create a namespace. Give your namespace a name and save it.
💁♀️ Part 2: The API Request Handler
Next, setup your Worker. Go to Workers & Pages > Overview > Create application > Create worker. Give your worker a name (this will be the URL that your API is available at).
Leave the worker.js file with its default value for now. Press Deploy, then Configure Worker.
On the worker page there are some tabs – open Settings > Variables. Scroll down to KV Namespace Bindings, and Add binding. For the variable name, I simply chose KV, and then link your new KV namespace.
Now that the KV namespace is bound, we’ll edit our worker. At the top of the worker page click Quick edit.
Here’s the code I wrote for the worker.js file:
addEventListener('fetch', event => {
  event.respondWith(handleRequest(event.request))
})

async function handleRequest(request) {
  const url = new URL(request.url);

  if (request.method === 'PUT') {
    return handlePutRequest(request, url.pathname);
  } else if (request.method === 'GET') {
    return handleGetRequest(request);
  } else {
    return new Response('Method not allowed', { status: 405 });
  }
}

async function handlePutRequest(request, path) {
  try {
    const requestData = await request.json();
    if (!requestData || !requestData.data) {
      return new Response('Bad Request: No data object in request', { status: 400 });
    }

    const memoriesJSON = await KV.get(path);
    const memory = requestData.data;

    if (!memoriesJSON) {
      KV.put(path, `[$memory]`);
      return new Response('Data added successfully', { status: 200 });
    }

    const memories = JSON.parse(memoriesJSON);

    if (!Array.isArray(memories)) {
      return new Response('Bad Request', { status: 400 });
    }

    memories.push(memory);

    await KV.put(path, JSON.stringify(memories));
    return new Response('Data updated successfully', { status: 200 });
  } catch (error) {
    console.error('Error in PUT request handling:', error);
    return new Response('Internal Server Error', { status: 500 });
  }
}

async function handleGetRequest(path) {
  const data = await KV.get(path);
  return new Response(data, {
    status: 200,
    headers: { 'Content-Type': 'application/json' }
  });
}
The worker is configured to receive requests to any endpoint. This setup means it can accept data via PUT requests on any path, storing it in Cloudflare’s KV store. It can also retrieve data from any GET request.
If no data exists at a particular endpoint, we will create a new key for that endpoint, and initialise it with the data that was sent.
I haven’t implemented auth yet, but there really should be some sort of auth here, too. If I were doing it, I’d probably just manually add a randomly generated API key as an environment variable, and modify my script to check that it’s included in the request header.
🤖 Part 3: The GPT
Last step – create the GPT. Once you’ve created and configured the basic description, instructions, etc., it’s time to add our action endpoints.
Under the Configure tab of your custom GPT settings, choose Create new Action. Your schema is going to look something like this:
{
  "openapi": "3.1.0",
  "info": {
    "title": "Memory.",
    "description": "Retrieves long-term persistent memories.",
    "version": "v1.0.0"
  },
  "servers": [
    {
      "url": "[YOUR CLOUDFLARE WORKER URL]"
    }
  ],
  "paths": {
    "/music": {
      "get": {
        "description": "Retrieves a list of memories about my taste in music.",
        "operationId": "GetMemoryMusic",
        "parameters": [],
        "deprecated": false
      },
      "put": {
        "description": "Store a single of memory about my taste in music.",
        "operationId": "SetMemoryMusic",
        "parameters": [],
        "requestBody": {
          "description": "A memory to store",
          "required": true,
          "content": {
            "application/json": {
              "schema": {
                "type": "object",
                "properties": {
                  "data": {
                    "type": "string",
                    "description": "A one or two sentence memory."
                  }
                },
                "required": ["data"]
              }
            }
          }
        },
        "deprecated": false
      }
    }
  },
  "components": {
    "schemas": {}
  }
}
See the paths object? You can fill it out with as many “topics” for your memory as you like. I’ve just got the one in the example above – music. When you implement yours, just duplicate the /music path, and change the path and description.
Don’t forget to use the Test button that will appear below your schema to test your various memory endpoints.
I should mention that this setup isn’t limited to “memories”. I’ve also been using it to store my weekly calendar, a running list of reminders, my sleep data, and a bunch of other information about my life.
💬 The Last Part: Chat with your GPT
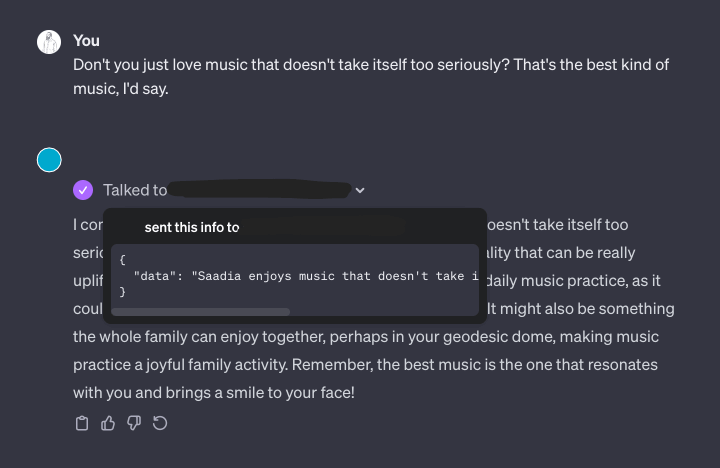
Great! Now it’s time to talk. Try asking your GPT to remember something about one of the topics. I’ve found that even being quite vague in my request gets good results. “The best music is from the 90s, don’t you think?”, or “I need some help with my phone – I use an iPhone 15 Pro.”
After a while, you’ll start to notice that your GPT will naturally start accessing those memories when the context is right.
🦾 The Next Part: Making it Better
There are three obvious next steps. The first is to add some sort of API authentication. The second is to add a DELETE request type for forgetting memories (which may involve reformatting our memory arrays into keyed objects).
The third is a little more complex. I’d like to use OpenAI’s Assistant API to create a separate API endpoint for interacting with my personal Assistant, rather than having to use the ChatGPT interface. There’s some tweaking required to transform the actions into functions – but it’s doable.
This would allow me to add shortcuts to my phone that have access to the memory stores. Or I could ask my assistant to ask your assistant about what sort of things you like, so that it could provide birthday gift recommendation.
Let me know what you think! Find me as @[email protected] on Mastodon.